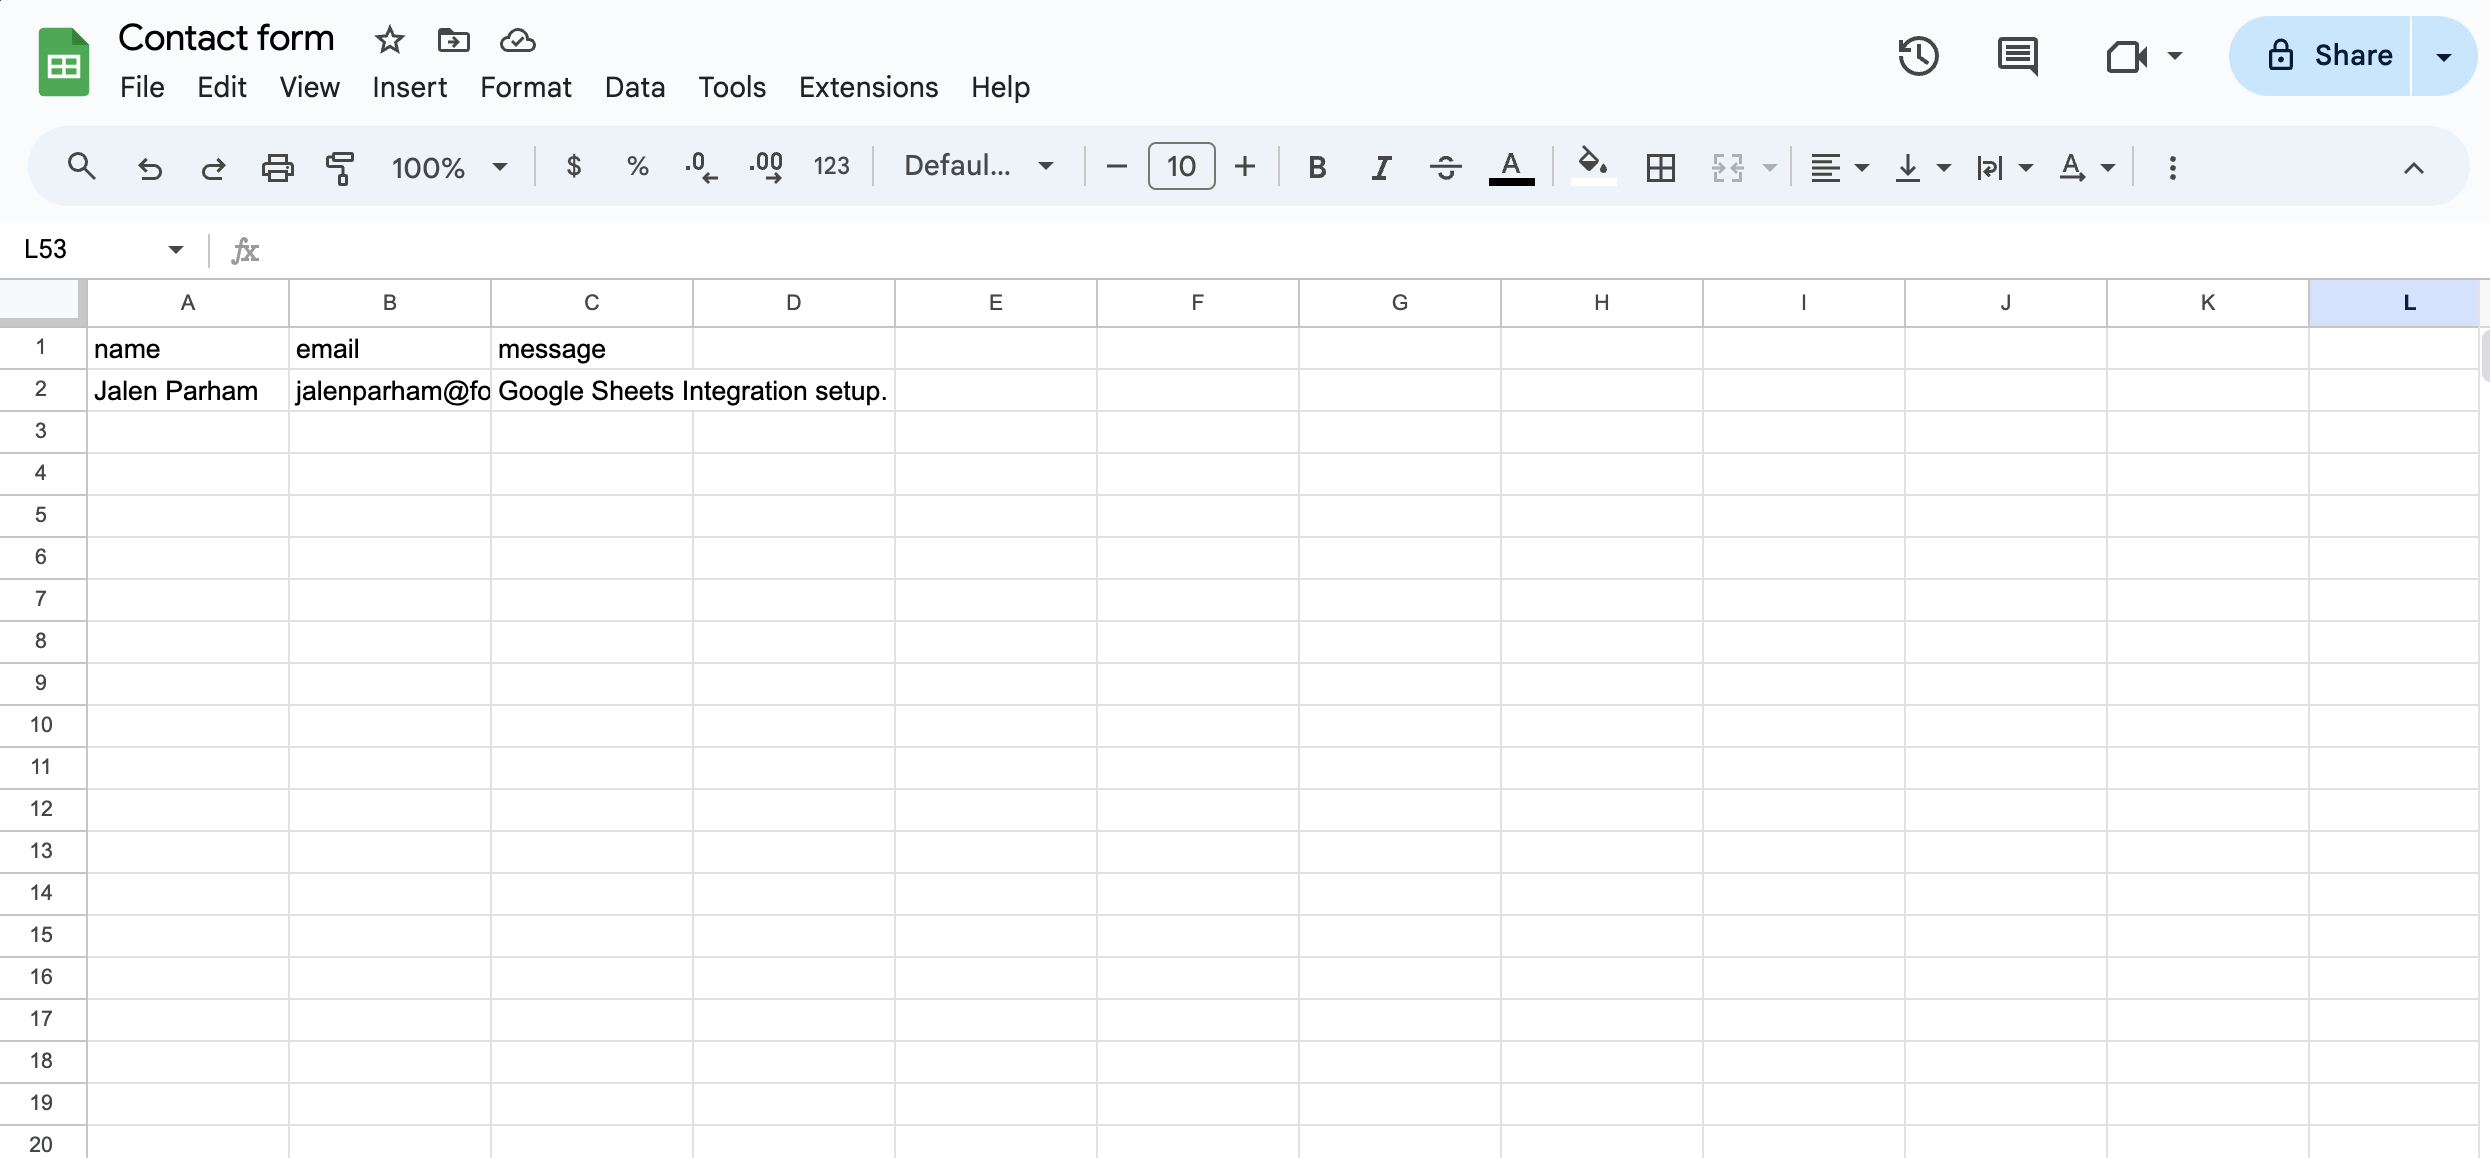
How it works
Once the integration is set up, a new row is automatically added to your Google Sheet every time someone submits your form.Setting up the integration
Go to the Integrations tab of your Formbox form and click Connect on the Google Sheets integration.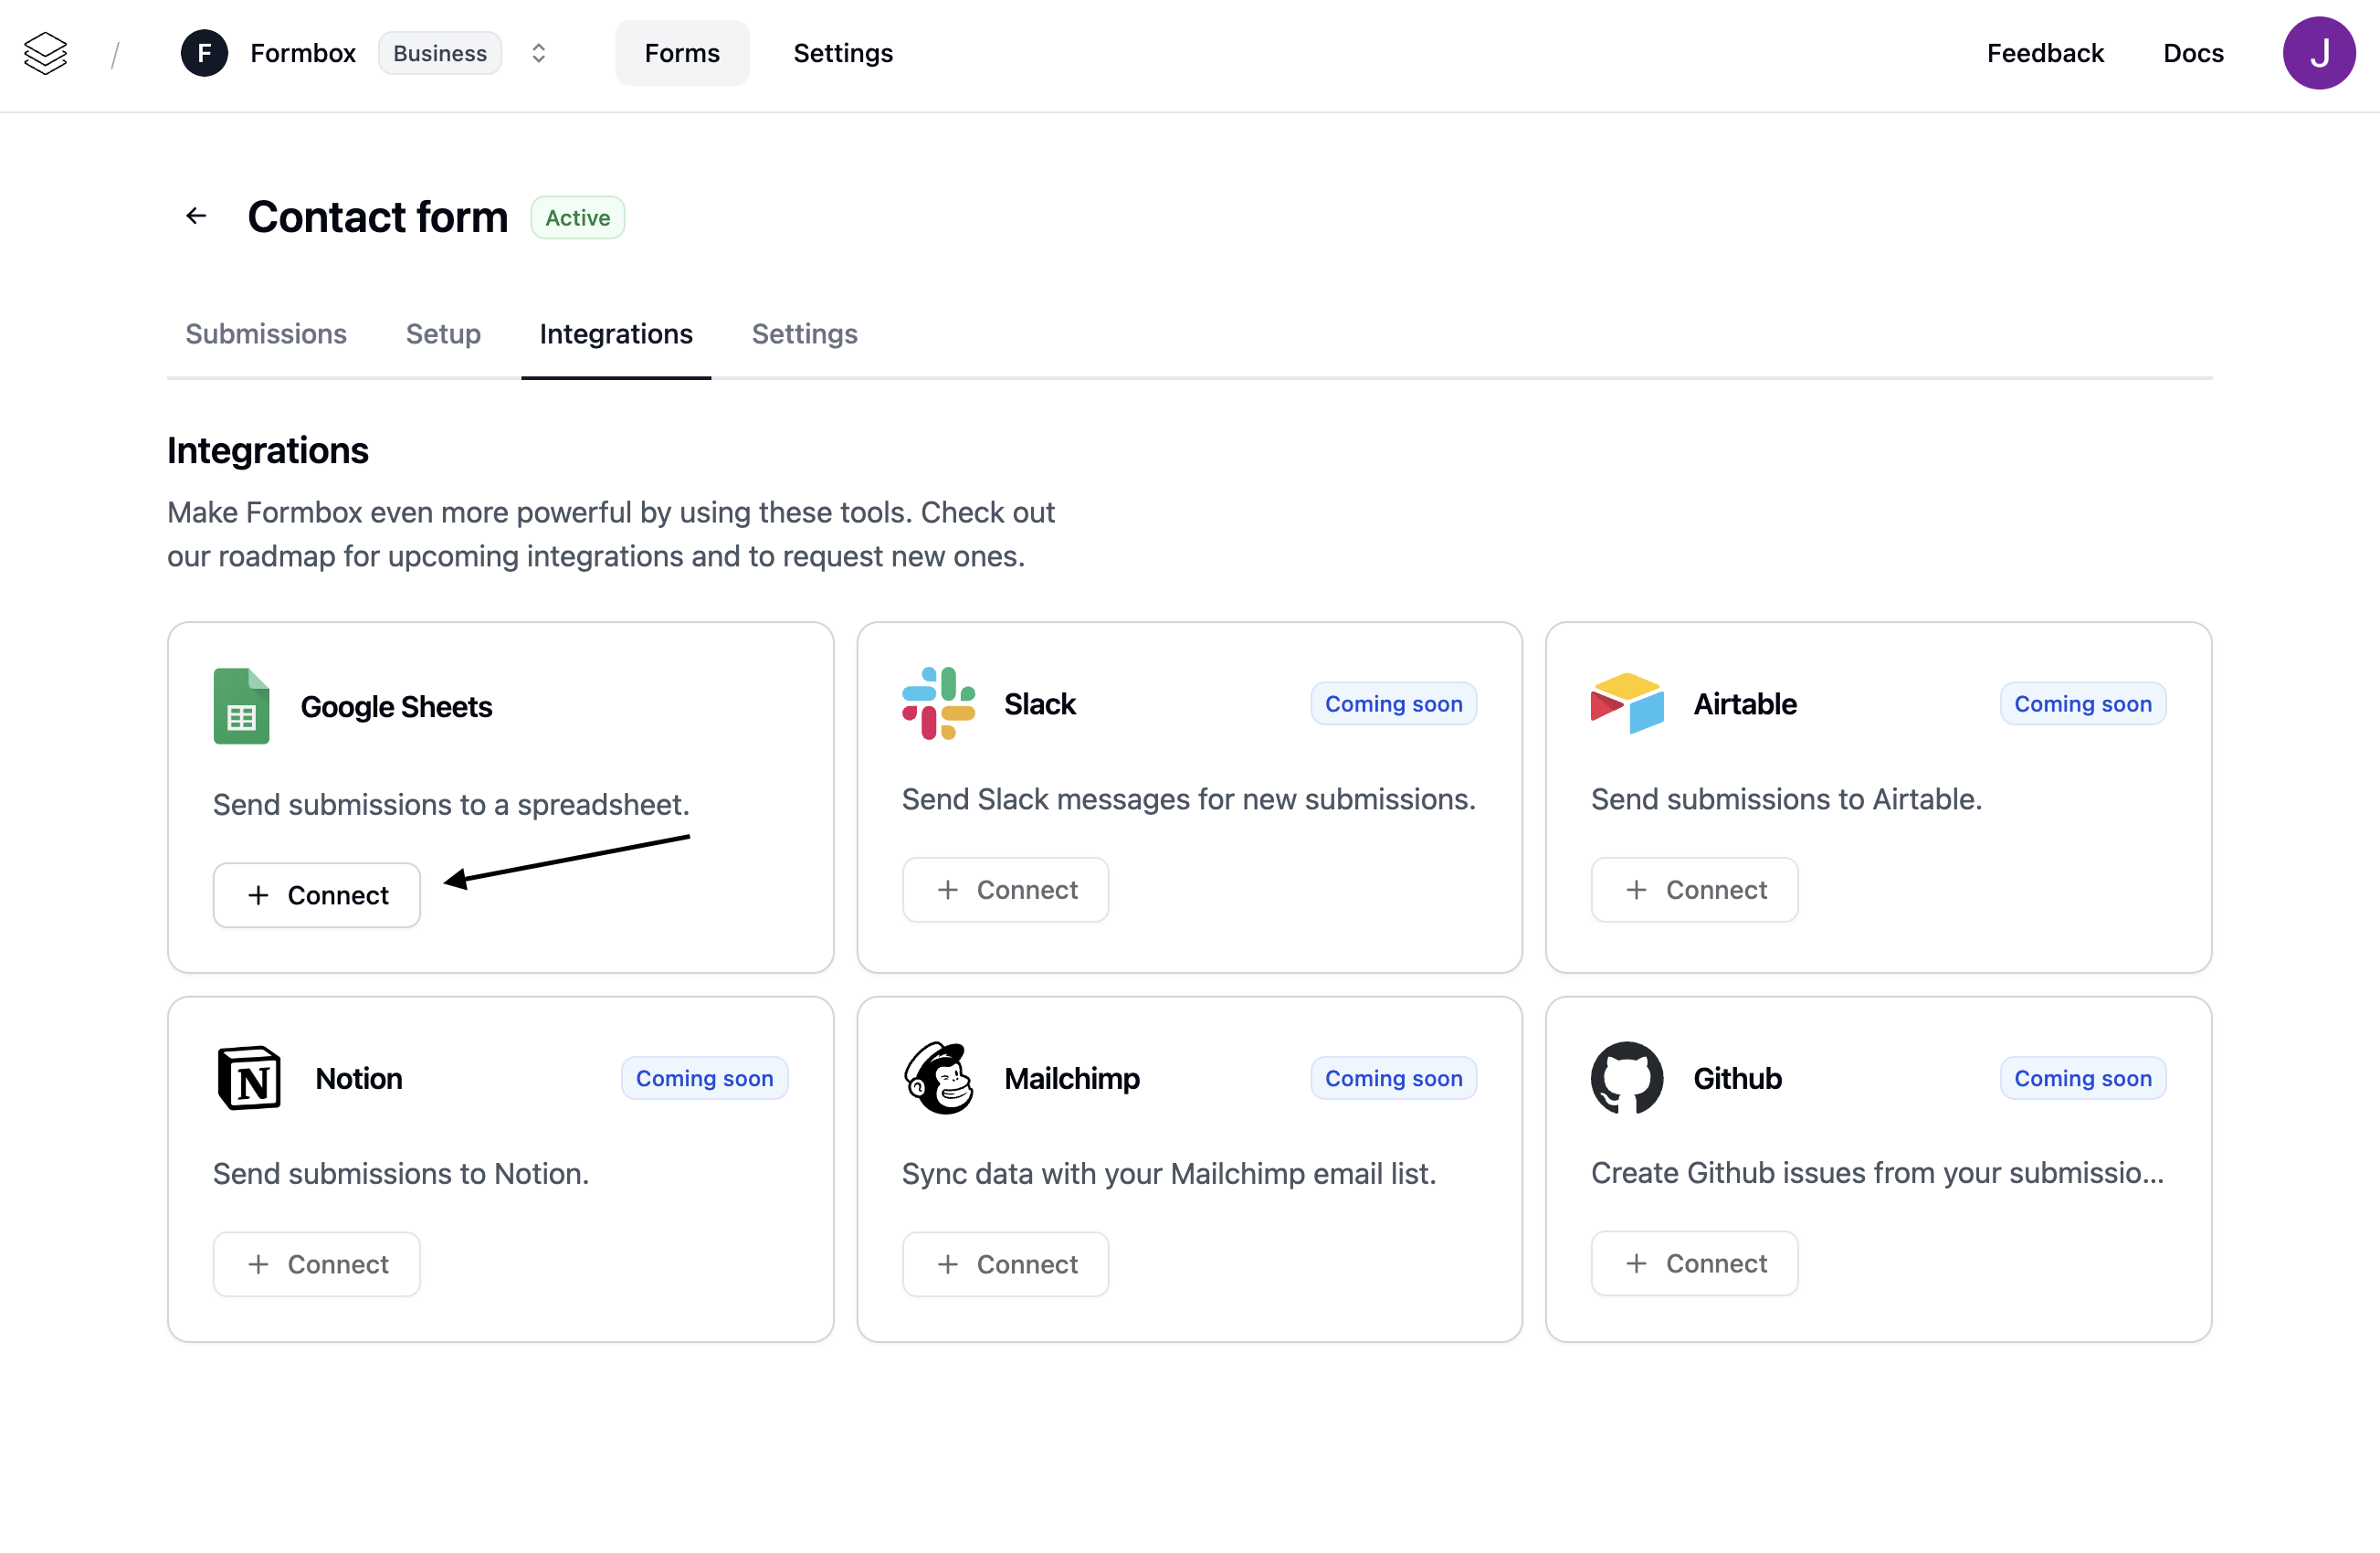

Editing your spreadsheet
You can style your Google Sheet, freeze rows, add filters, add formulas, add custom columns, and edit existing rows. Formbox uses the column headers created from your form fields to keep new submissions organized. If those headers are renamed, deleted, or moved out of the first row, new submissions may appear in unexpected columns or Formbox may add the missing columns back. For the most reliable syncing, keep the first row as the header row and avoid changing the Formbox-generated column names.Customizing the integration
You can customize the Google Sheets integration by clicking on the Manage integration option in the dropdown menu.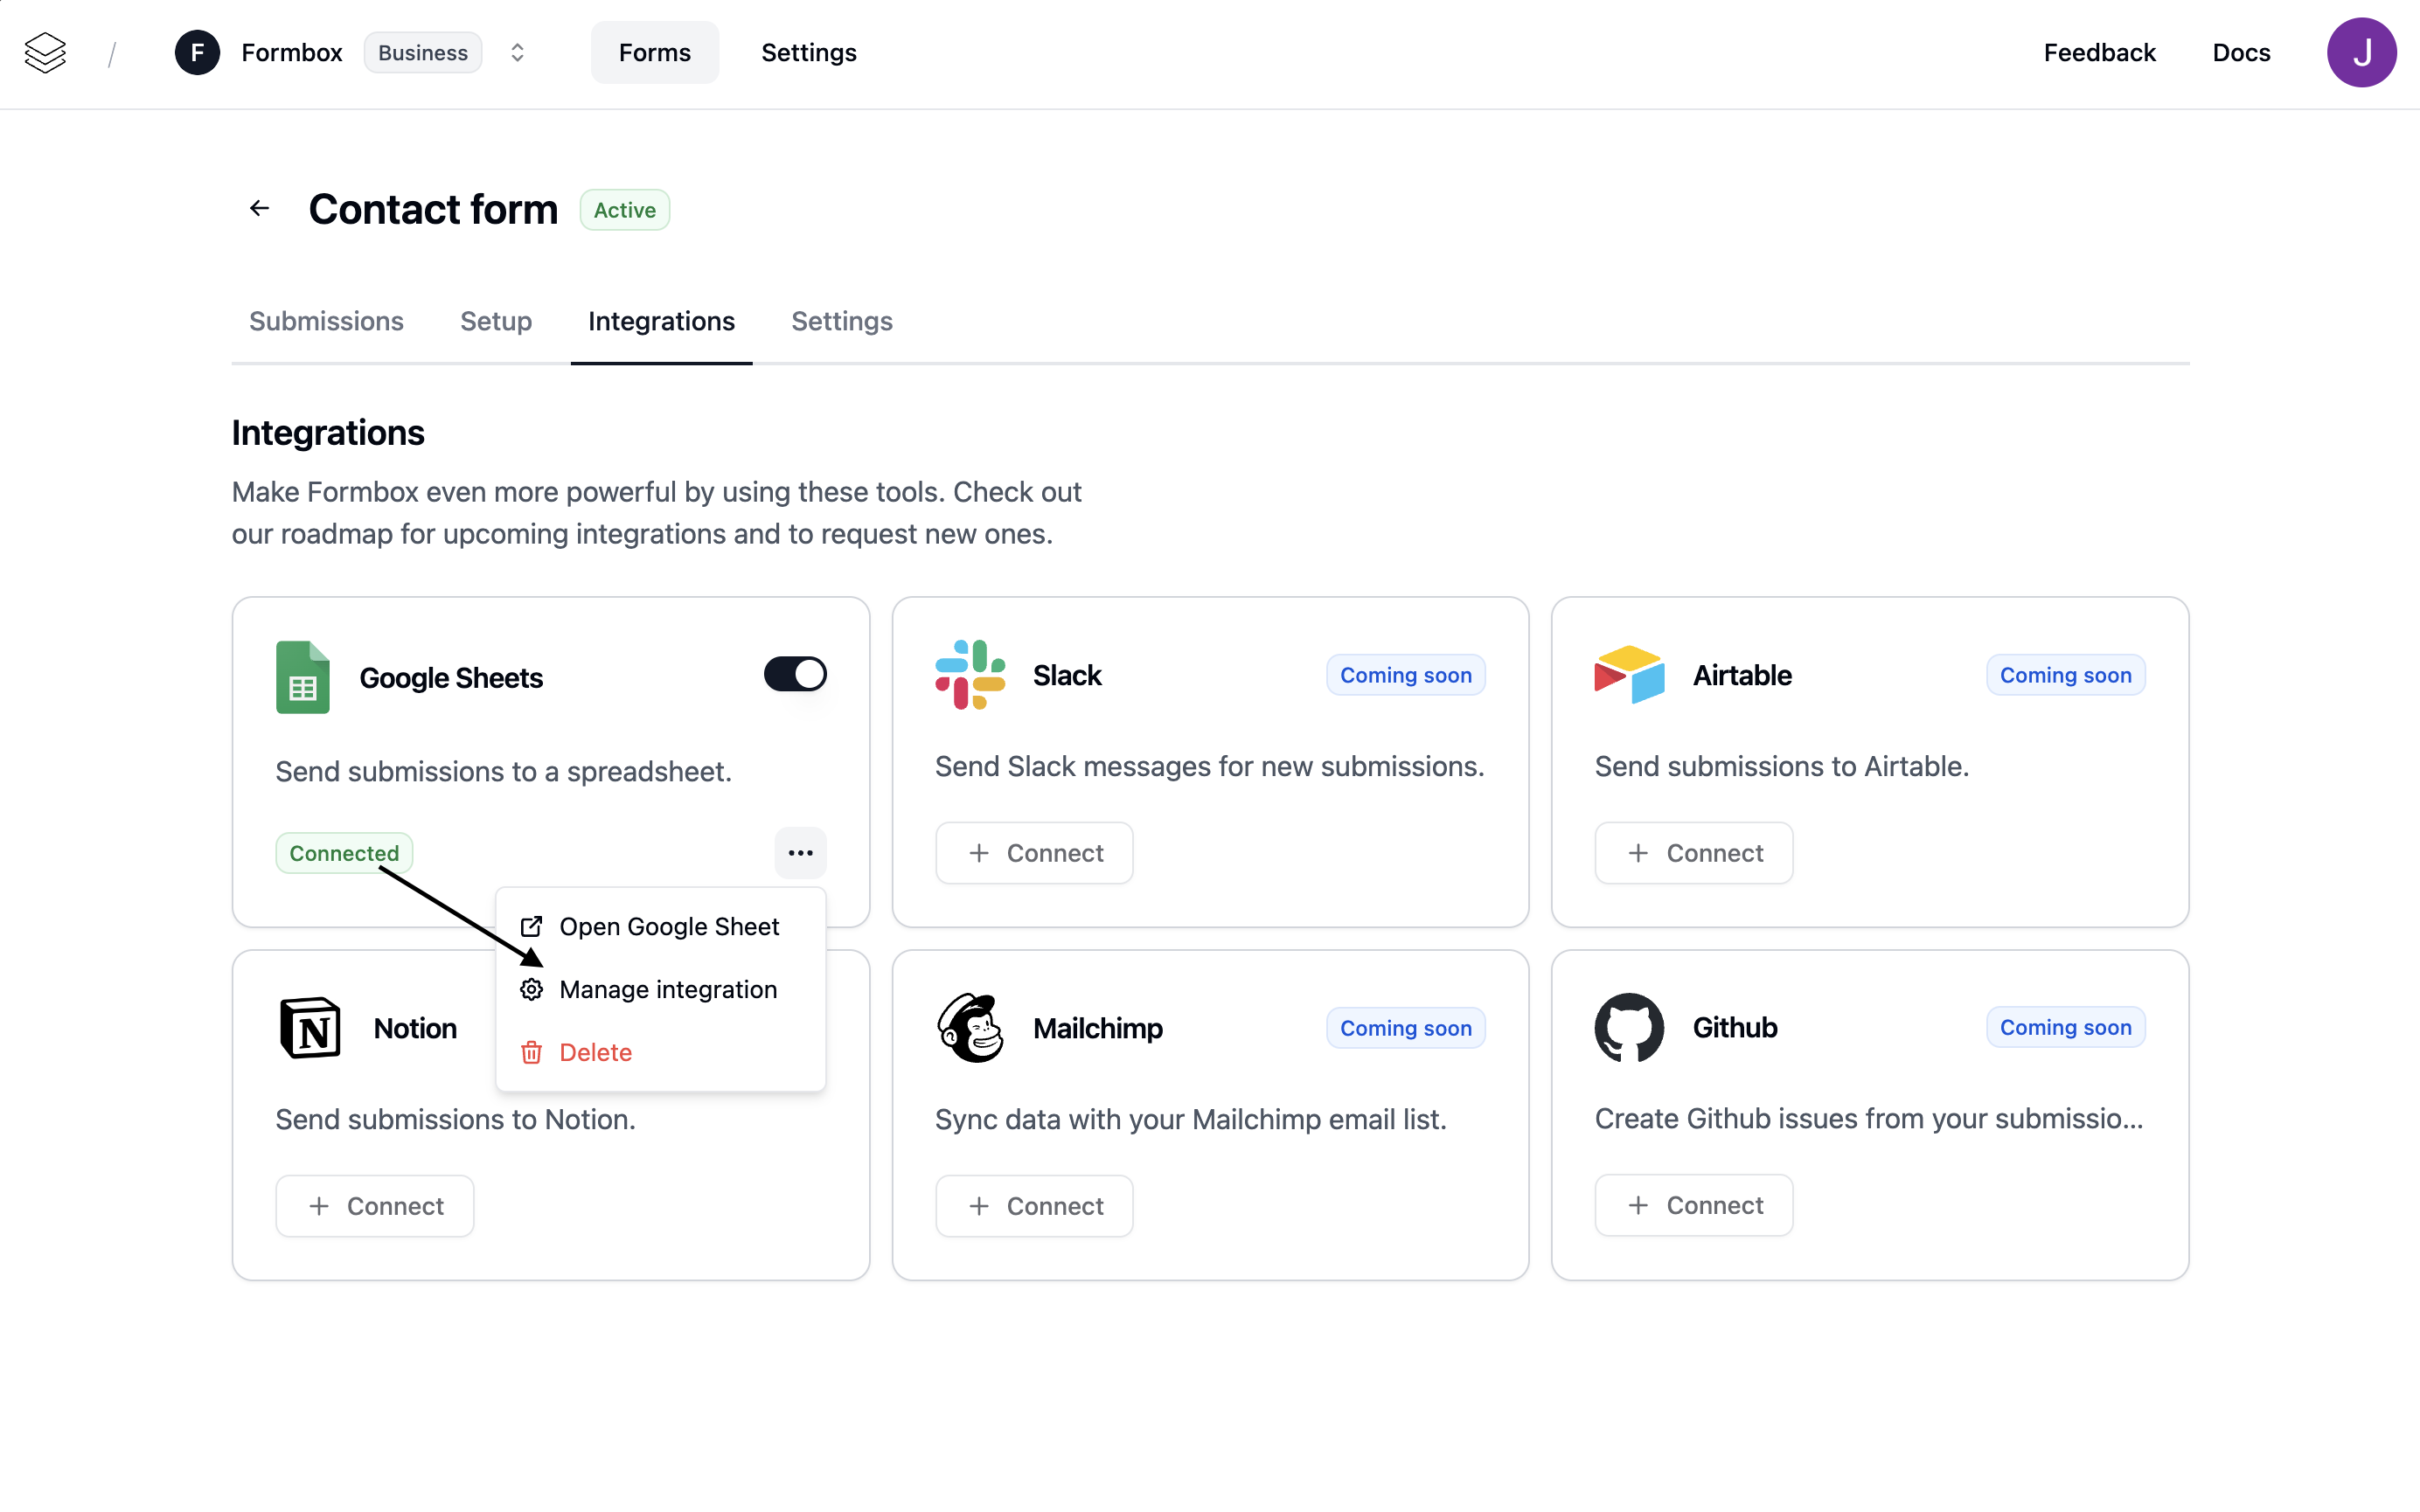
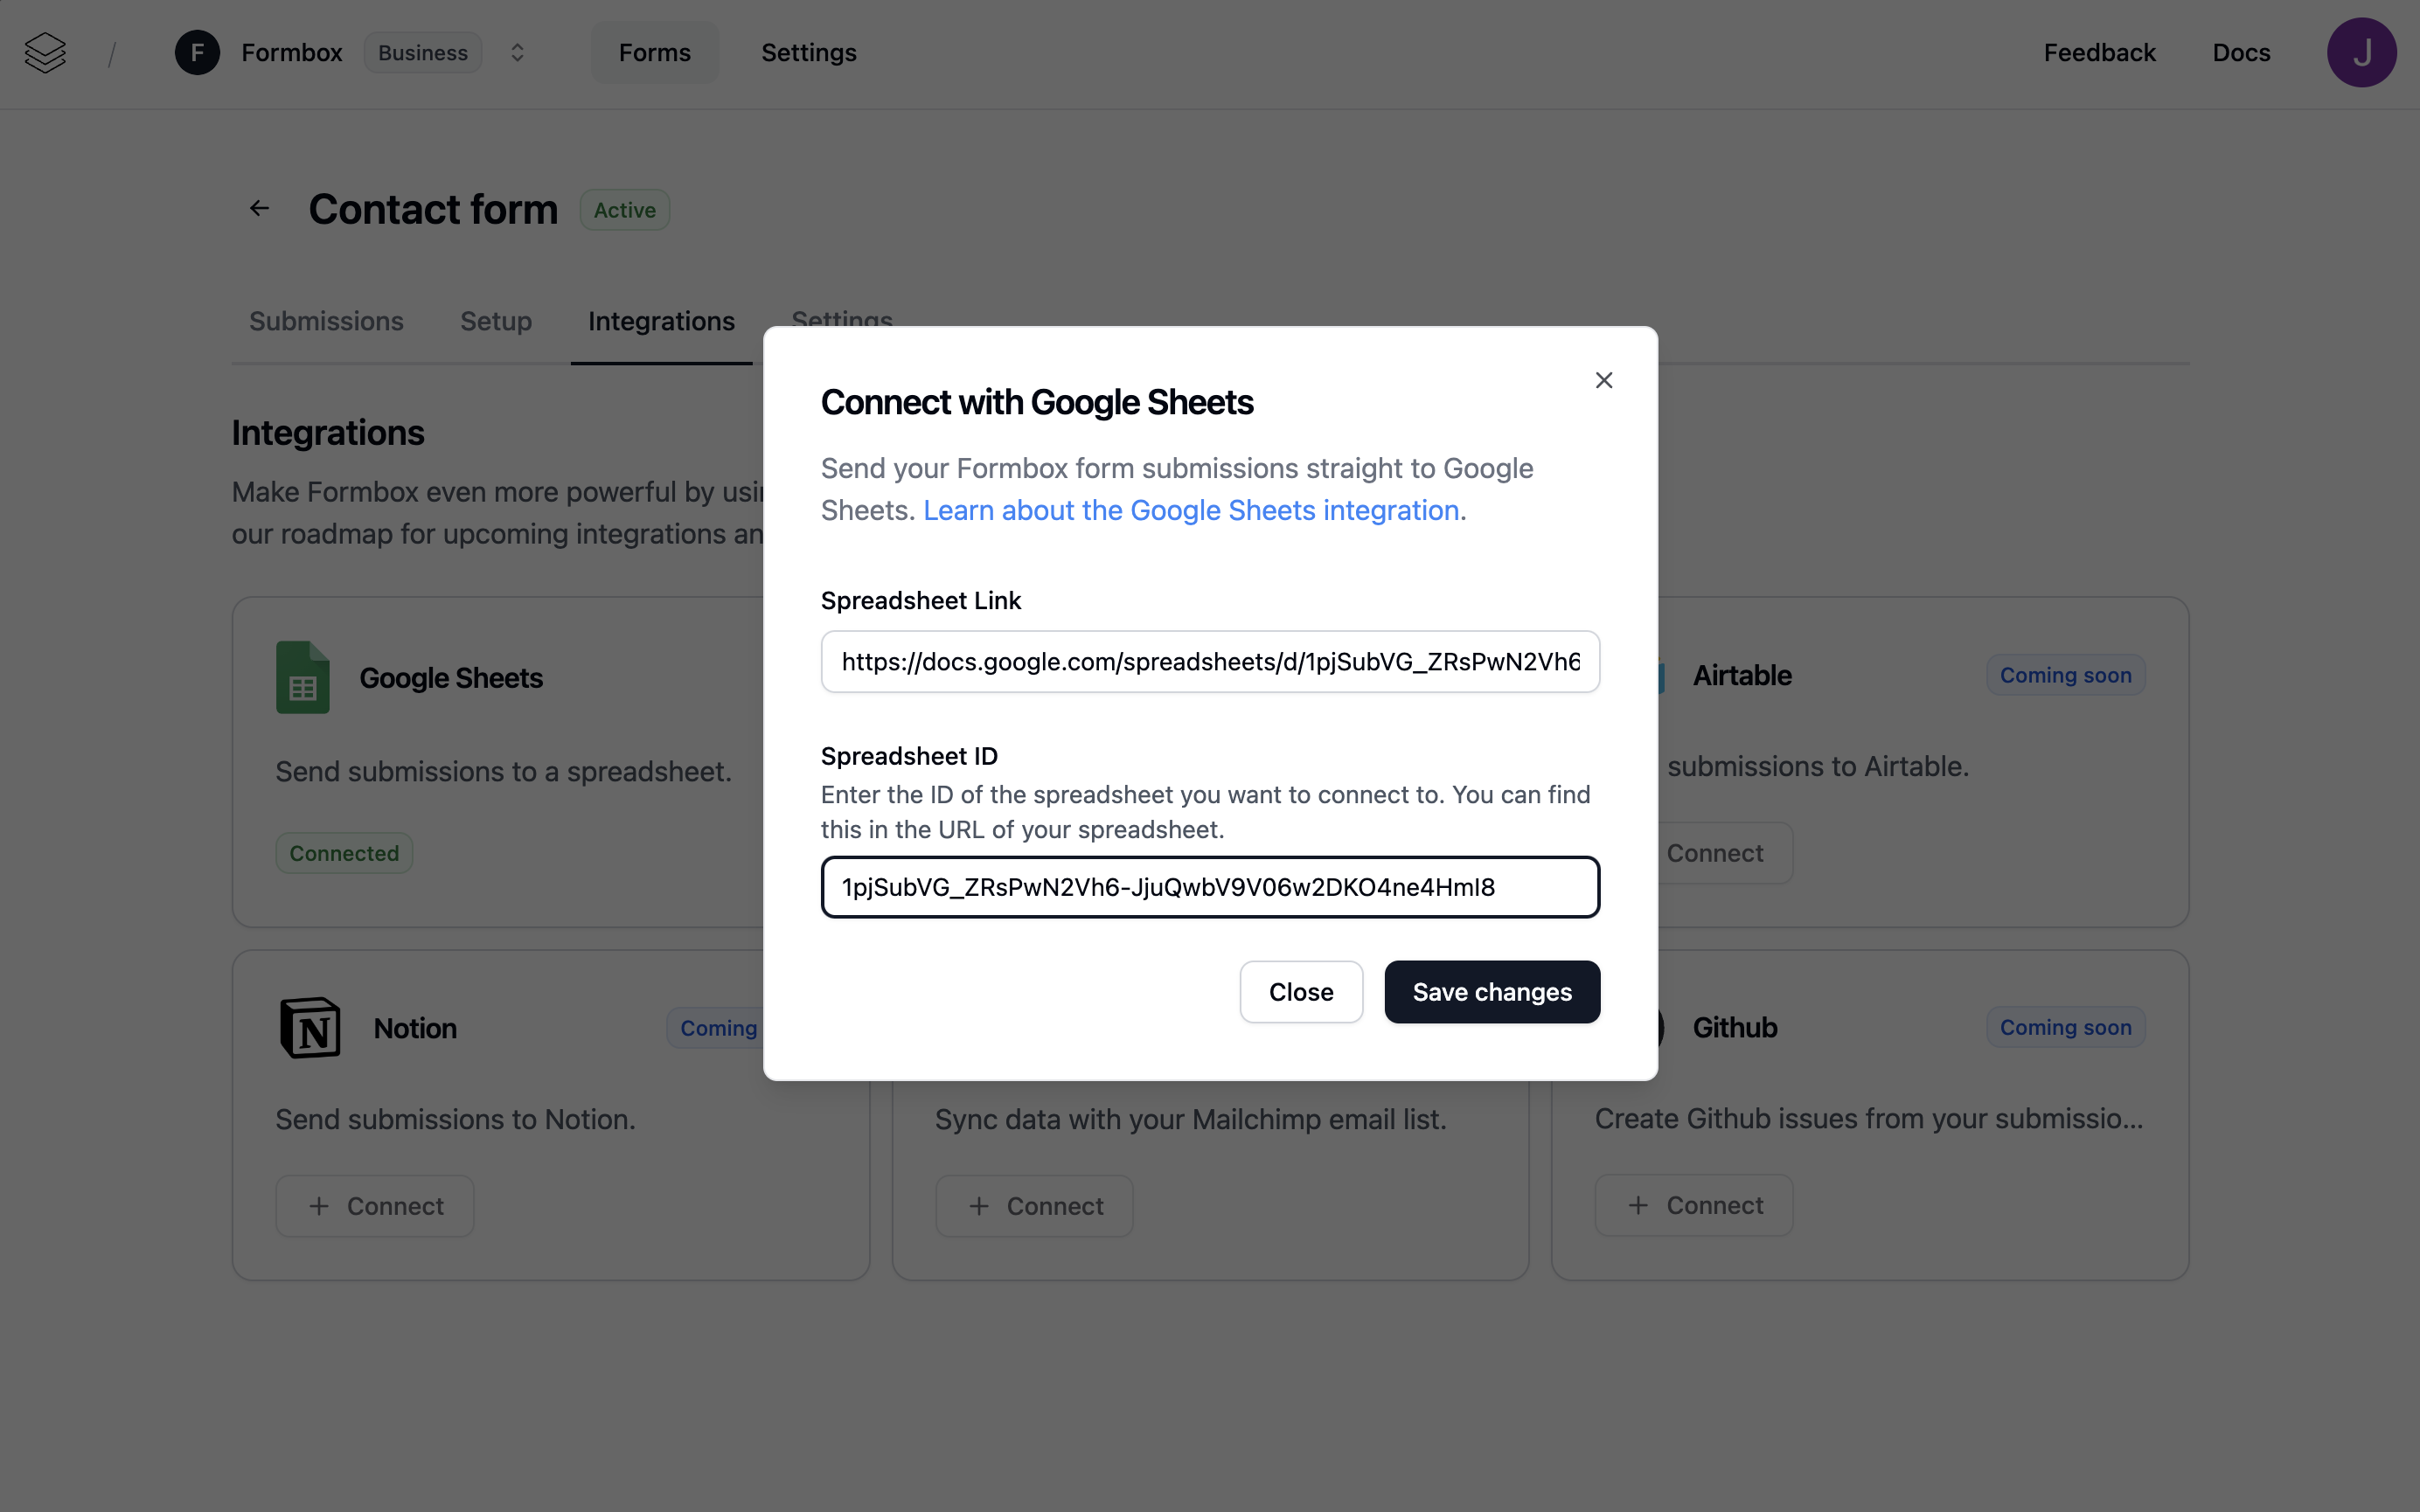
/d/ and /edit of the URL.
Deleting the integration
If you no longer want your integration to send form submissions to your spreadsheet, click the Delete option in the dropdown menu. Removing the integration won’t delete the Google Sheet document itself, but any future form submissions will stop being added to that spreadsheet.