Spam filtering
Spam filtering is the one the hardest parts of operating a form service. Everyone has a different tolerance for spam they expect to be filtered for them. There will always be some percentage of false positives with any spam filtering solution. We filter spam in order to protect our email sending reputation, this is what enables us to land emails in your inbox instead of your spam folder.
Please keep in mind that we don’t delete a submission if we think it’s a spam, we only mark it as a spam. Therefore we filter out the spam submissions when you check the submissions inside the dashboard. We also don’t send email notifications for spam submissions.
Formbox retains spam for 30 days before it is permanently deleted. Be sure to review your spam
folder frequently.
Honeypots
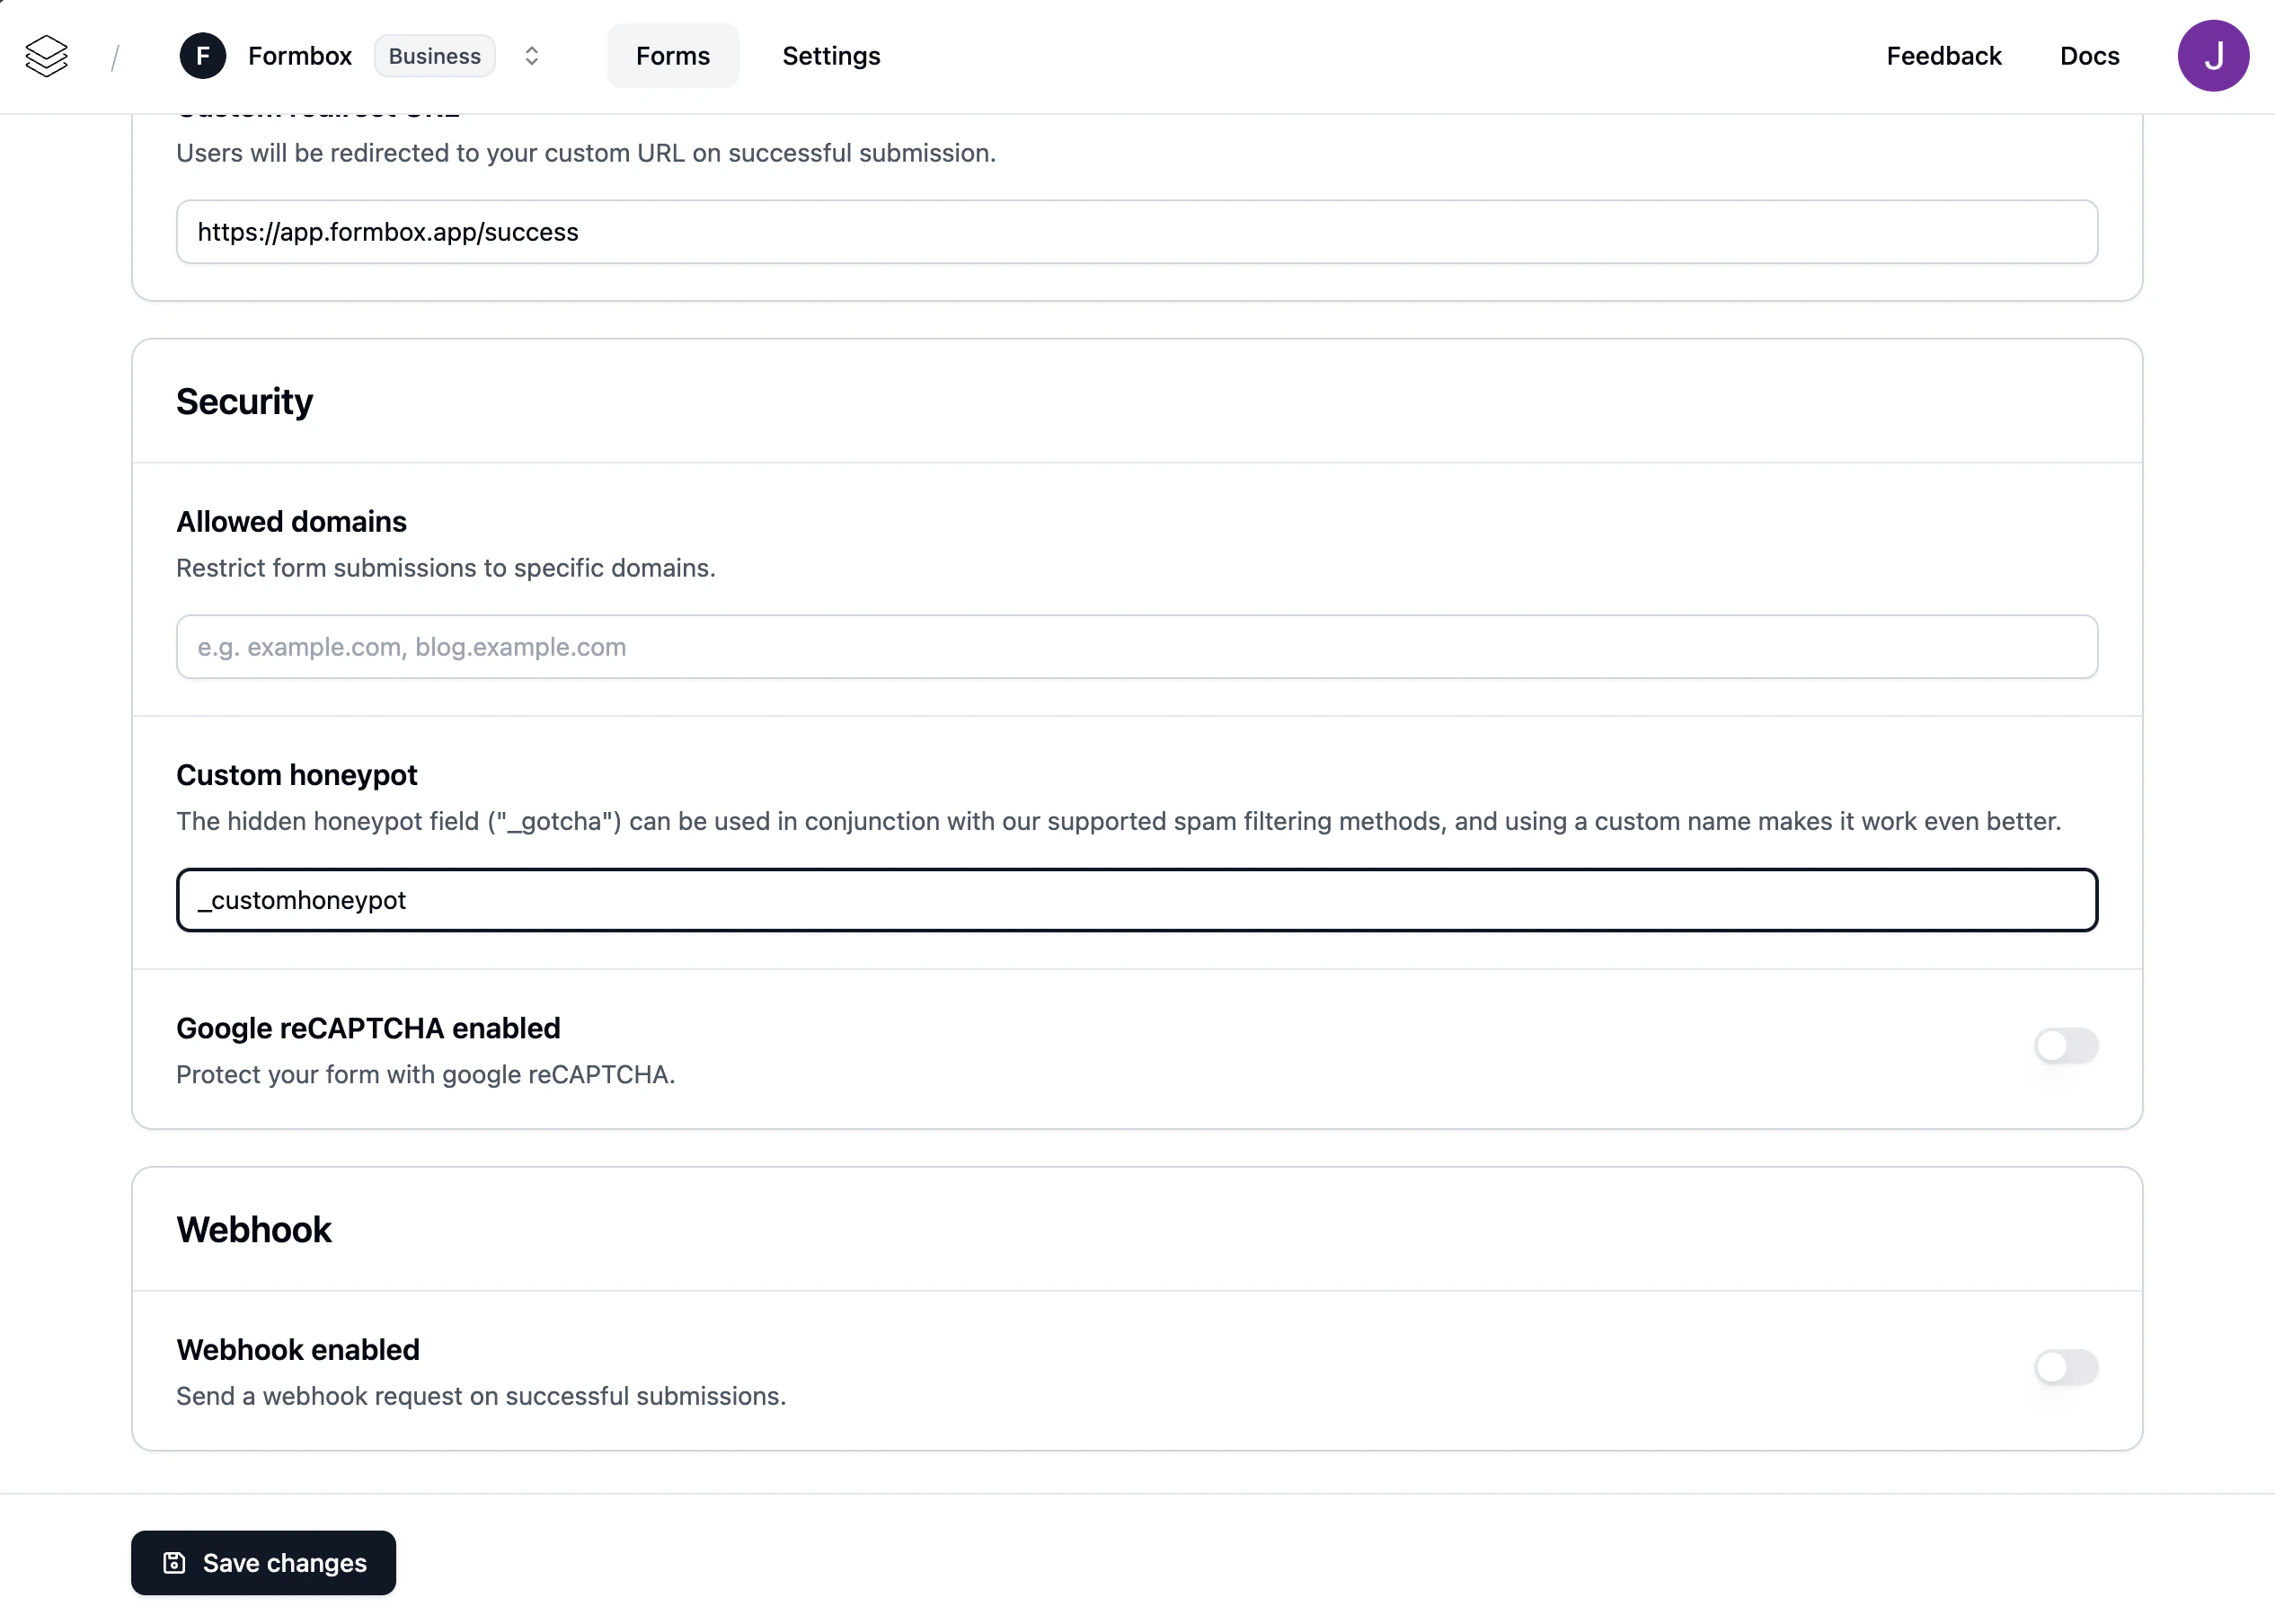
A honeypot is a simple spam filtering technique that adds a hidden field to your form that only bots can see. If the field is filled out, the submission is marked as spam. This is the easiest spam filtering option to implement and is available in your form’s settings.
You can also configure a custom honeypot field for your form. This is useful if you want to use a different field name or if you want to use it in addition our our default honeypot.
In your HTML code you need to add a hidden input field with the name you’ve configured in the form settings. For example:
The custom honeypot feature is not available on the Free plan.
AI spam filtering
We use Spamcheck.ai to accurately assess the legitimacy of your form’s submission content. It is an intelligent API solution that provides automatic protection and stops spam content from reaching your inbox. It uses machine learning to constanly and evolve to be better at what it does.
Google reCAPTCHA v3
ReCaptcha v3 is a service provided by Google that protects your forms from spam and abuse for free. It uses advanced risk analysis techniques to tell humans and bots apart. It is invisible to users and works in the background.
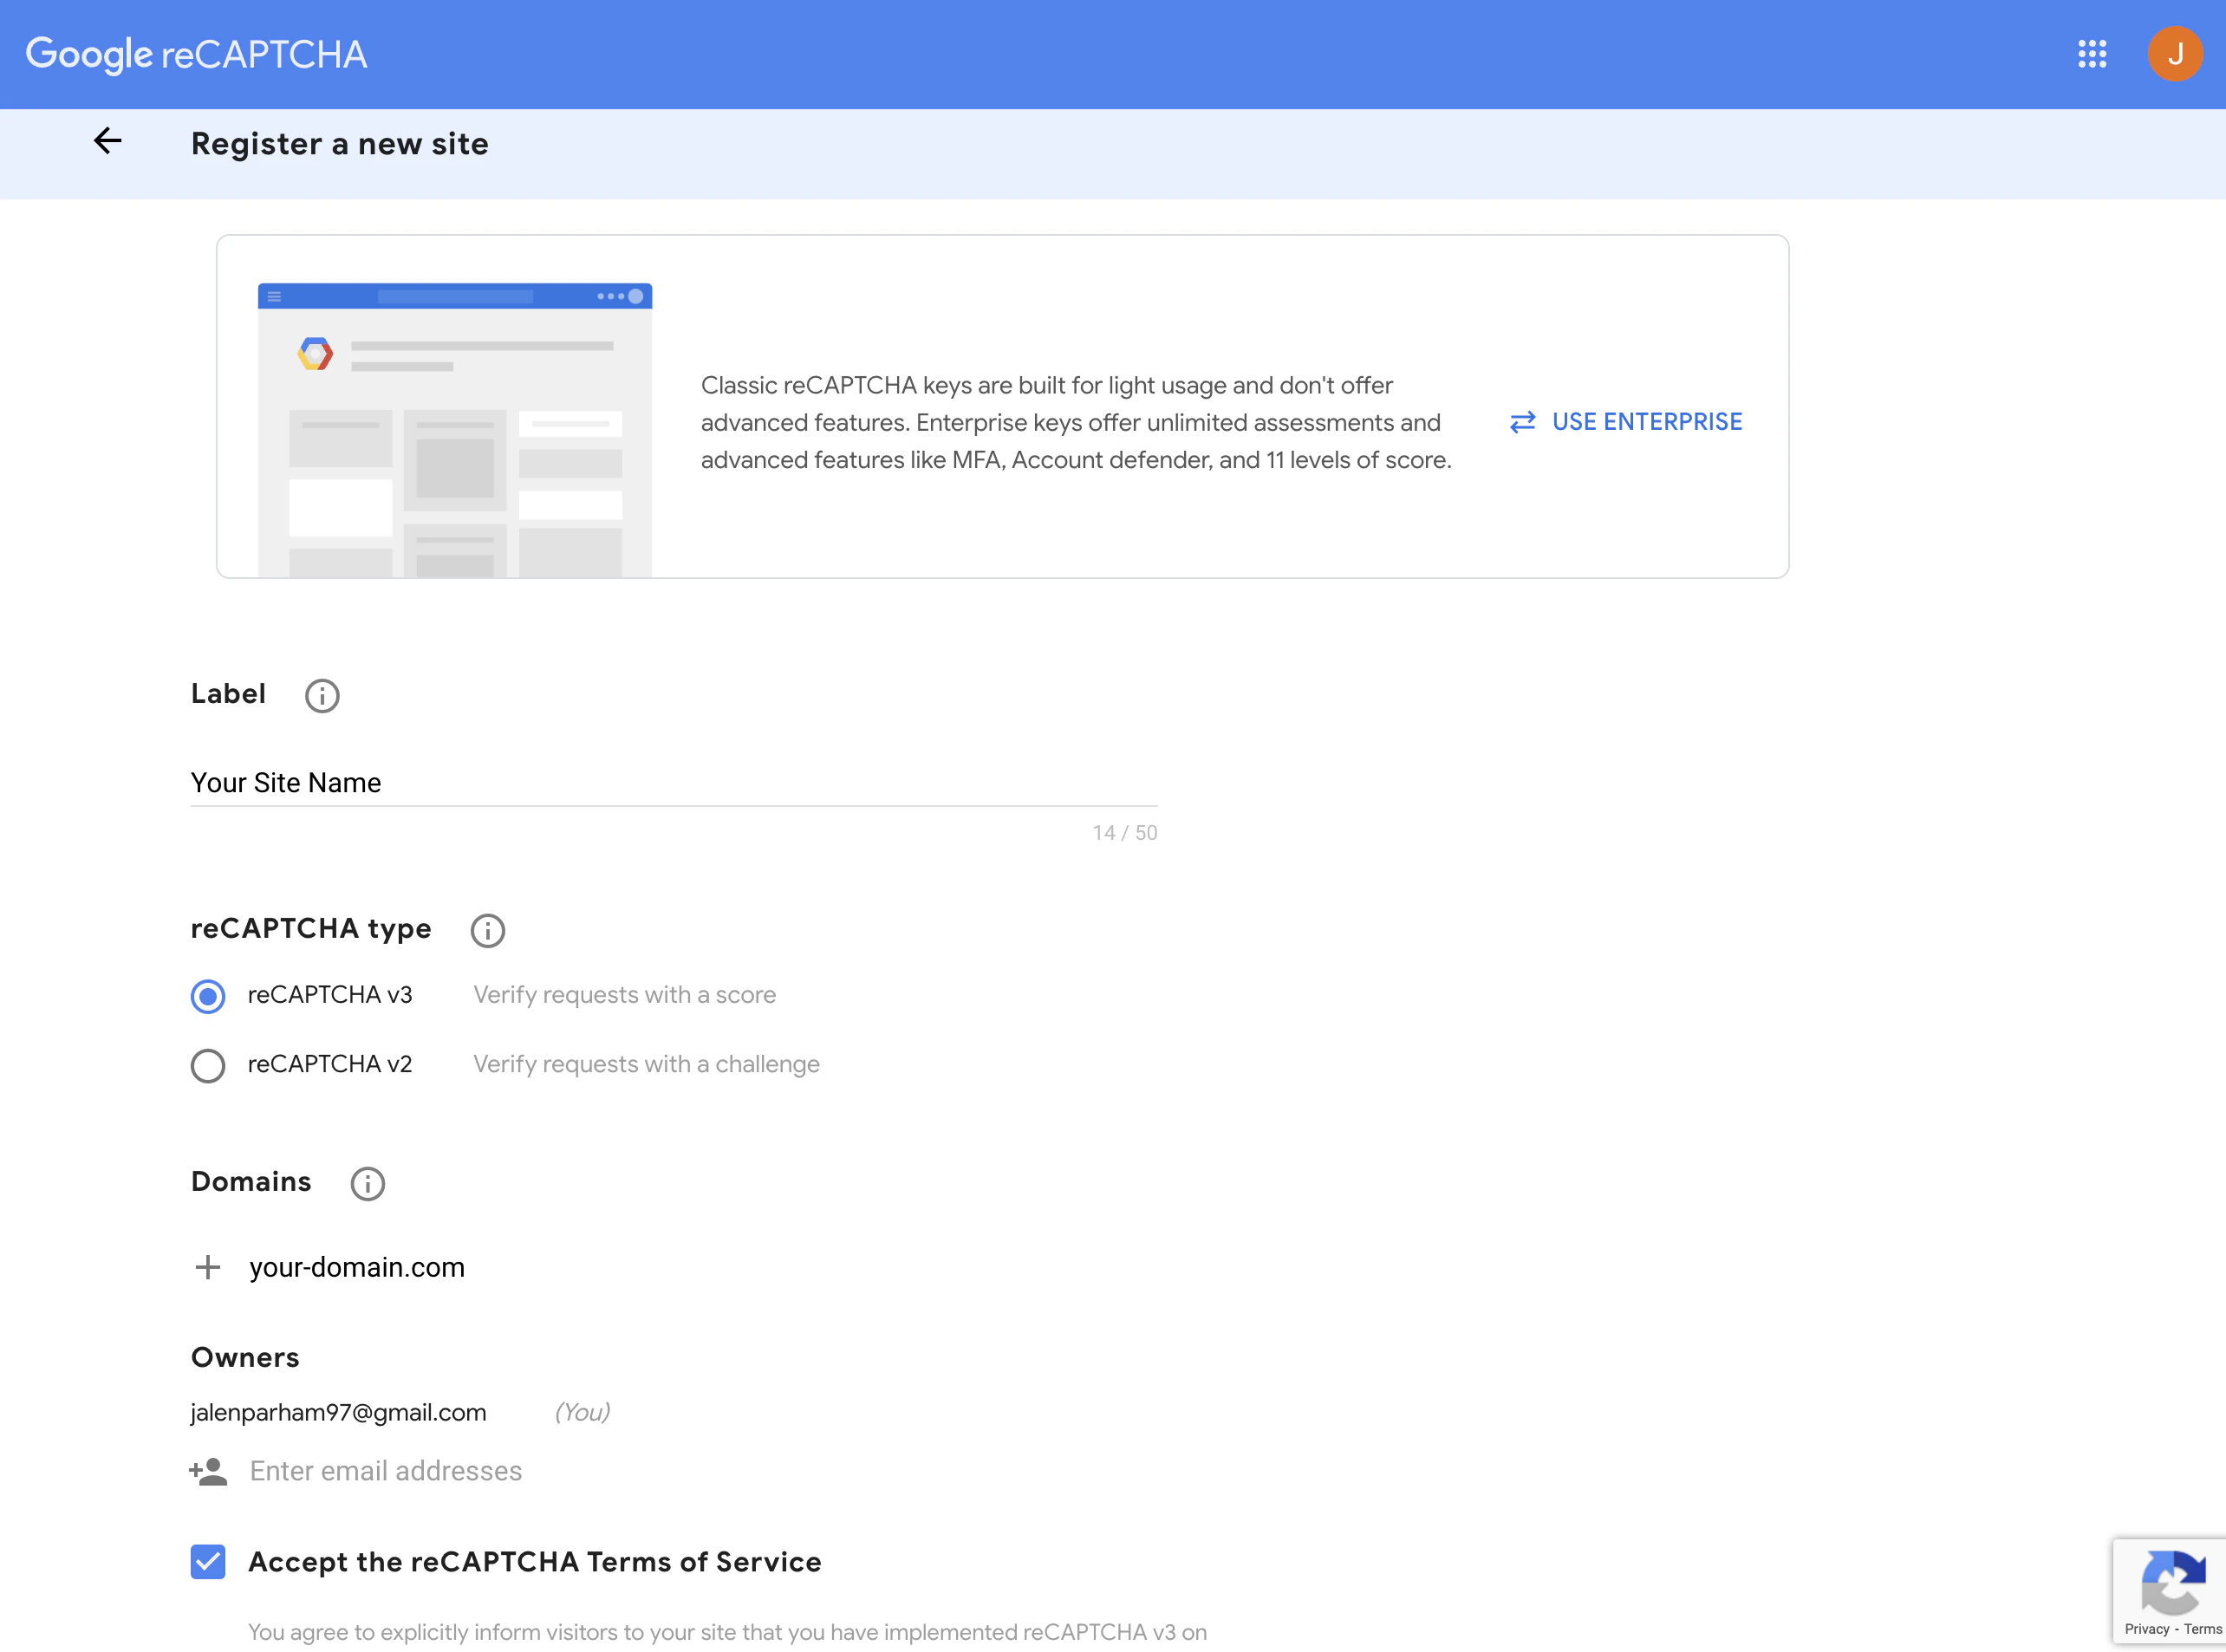
First, you will need to create a new site from the reCAPTCHA console. You can do so by clicking here.
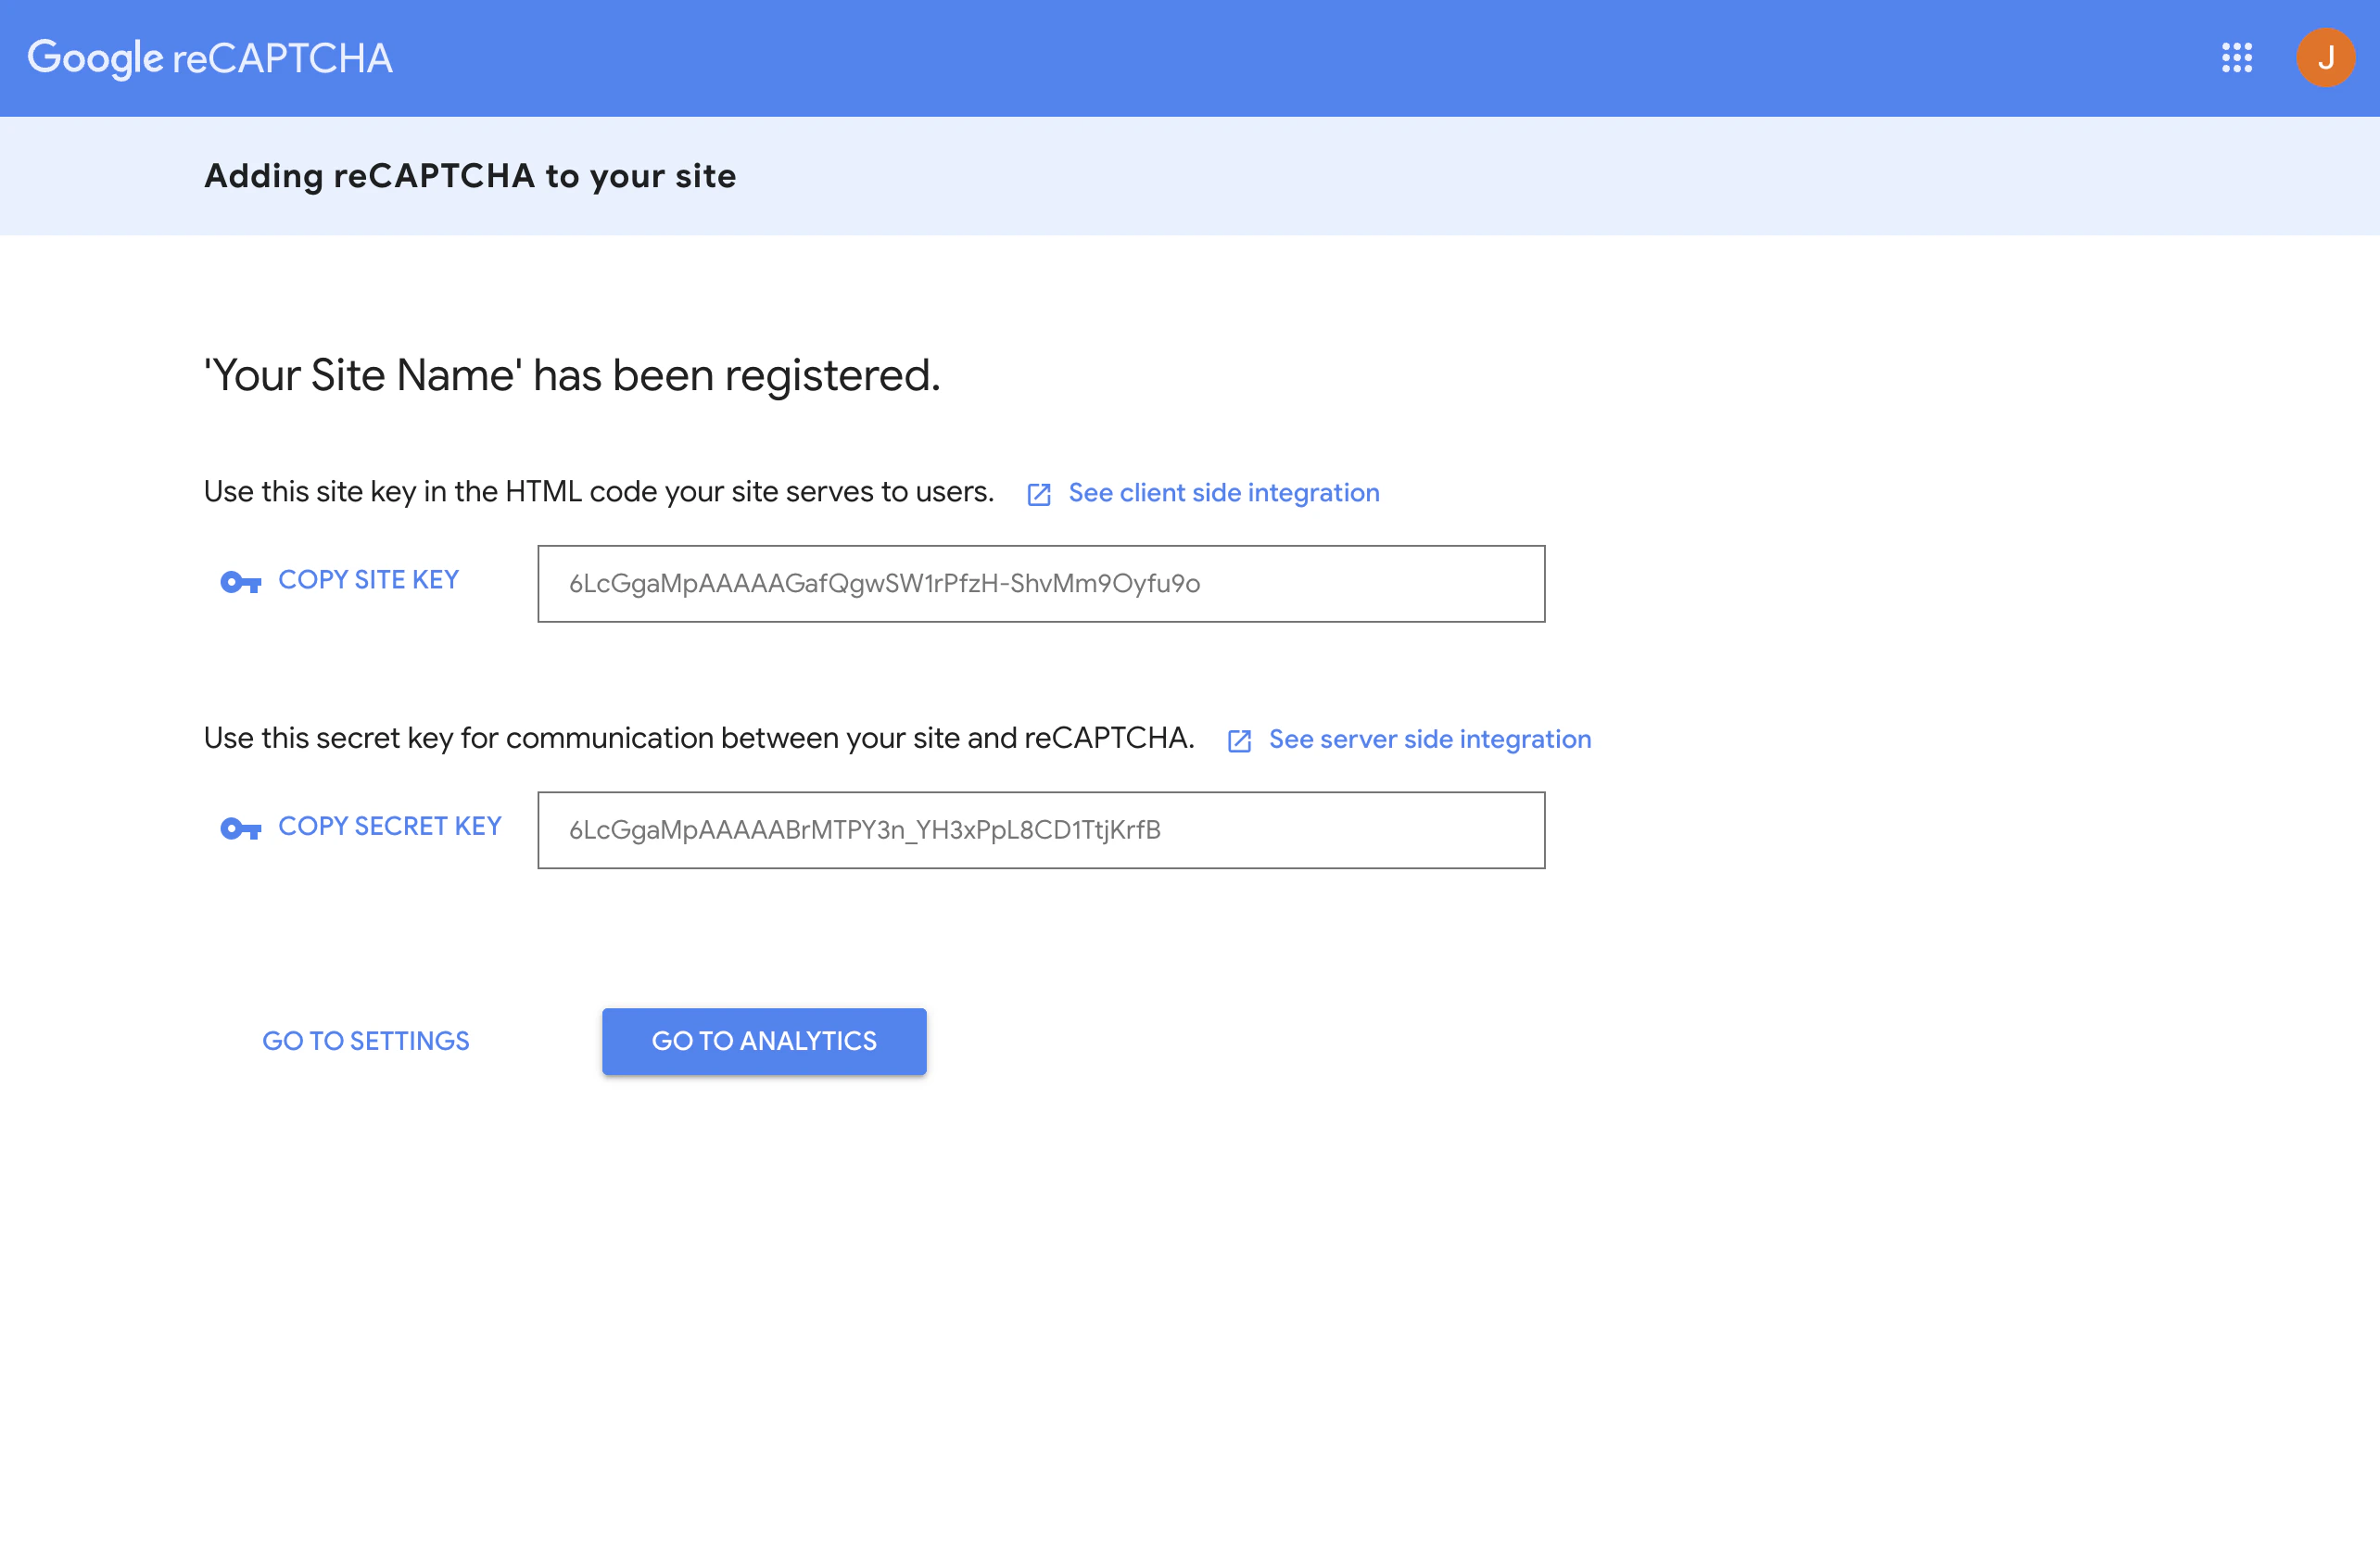
Fill in the required fields and click on the Submit button. You will be redirected to a page where you can find your site key and secret key.
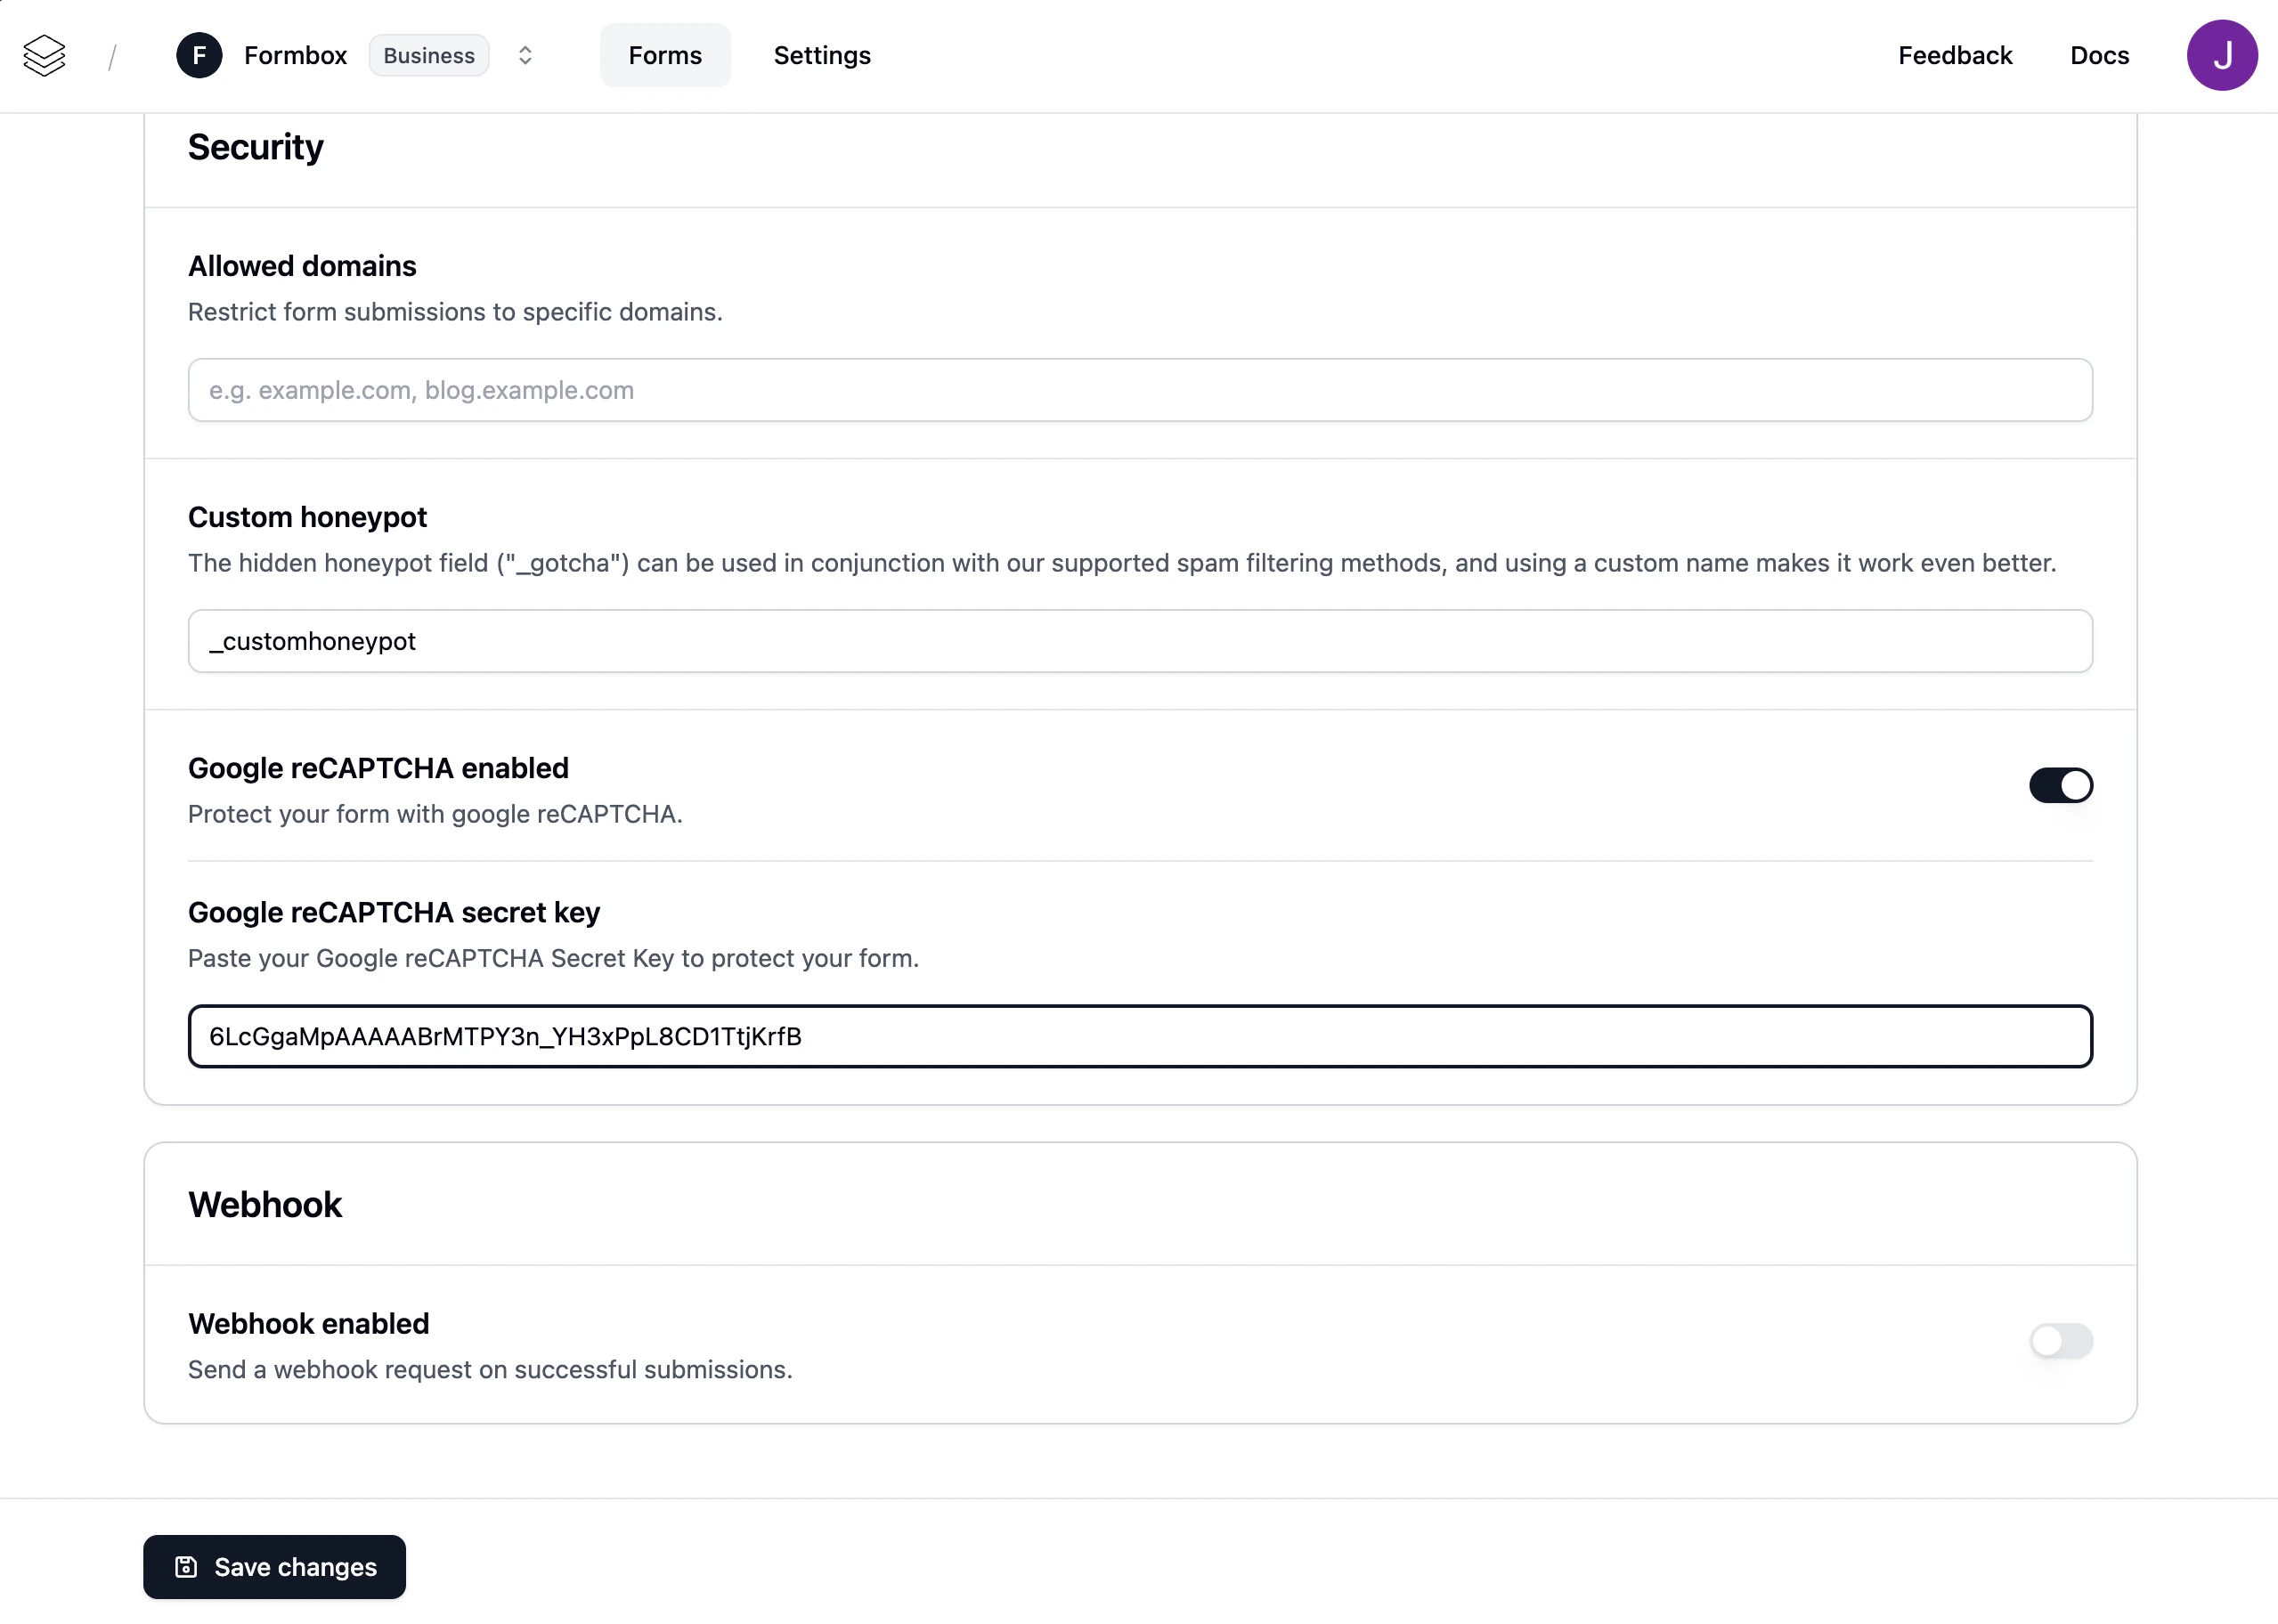
Copy the site key and secret key and enable the recaptcha setting, then paste the secret key into the reCAPTCHA settings in your form settings and click Save changes.
Now that we have the reCAPTCHA keys configured in Formbox, we need to implement it in your HTML form.
Lets start by adding the reCAPTCHA script to the head of your HTML document:
Replace YOUR_SITE_KEY with the site key you copied from the reCAPTCHA console.
Next we need to add the reCAPTCHA token to the form submission. We can do this by adding a script tag to the bottom of the form:
The grecaptcha.ready function will make a request to Google and return a token. Normally you would send this token to your server and verify it with Google. However, since Formbox handles the form submissions, we will take a different approach.
Lets start by adding a hidden input field to the form:
Next we need to update the script to set the token as the value to the hidden input field:
Now when the form is submitted, the reCAPTCHA token will be sent along with the form data. Formbox will verify the token with Google and if it’s valid, the submission will be successful, otherwise it will be marked as spam.